
How to Install Metal Roofing: Step-by-Step Guide for Beginners (2026)
Installing a metal roof may seem like a big project, but doing it the right way can protect your home for decades. Poor roof installation can lead to leaks, wasted money, and a shorter roof lifespan. A properly installed metal roofing system offers excellent weather protection, improves roof durability, helps reduce cooling costs by reflecting heat, and can even wash leaves and sticks off the roof with a light rain, making maintenance much easier.
In this step-by-step guide, you'll learn how to install a metal roof using simple instructions that are easy for beginners to follow. From roof preparation and roofing panels to flashing, ridge caps, and the final installation steps, this metal roof installation guide explains the complete process to help you install a metal roof safely, improve long-term roof performance, and avoid common installation mistakes.
Before You Install a Metal Roof
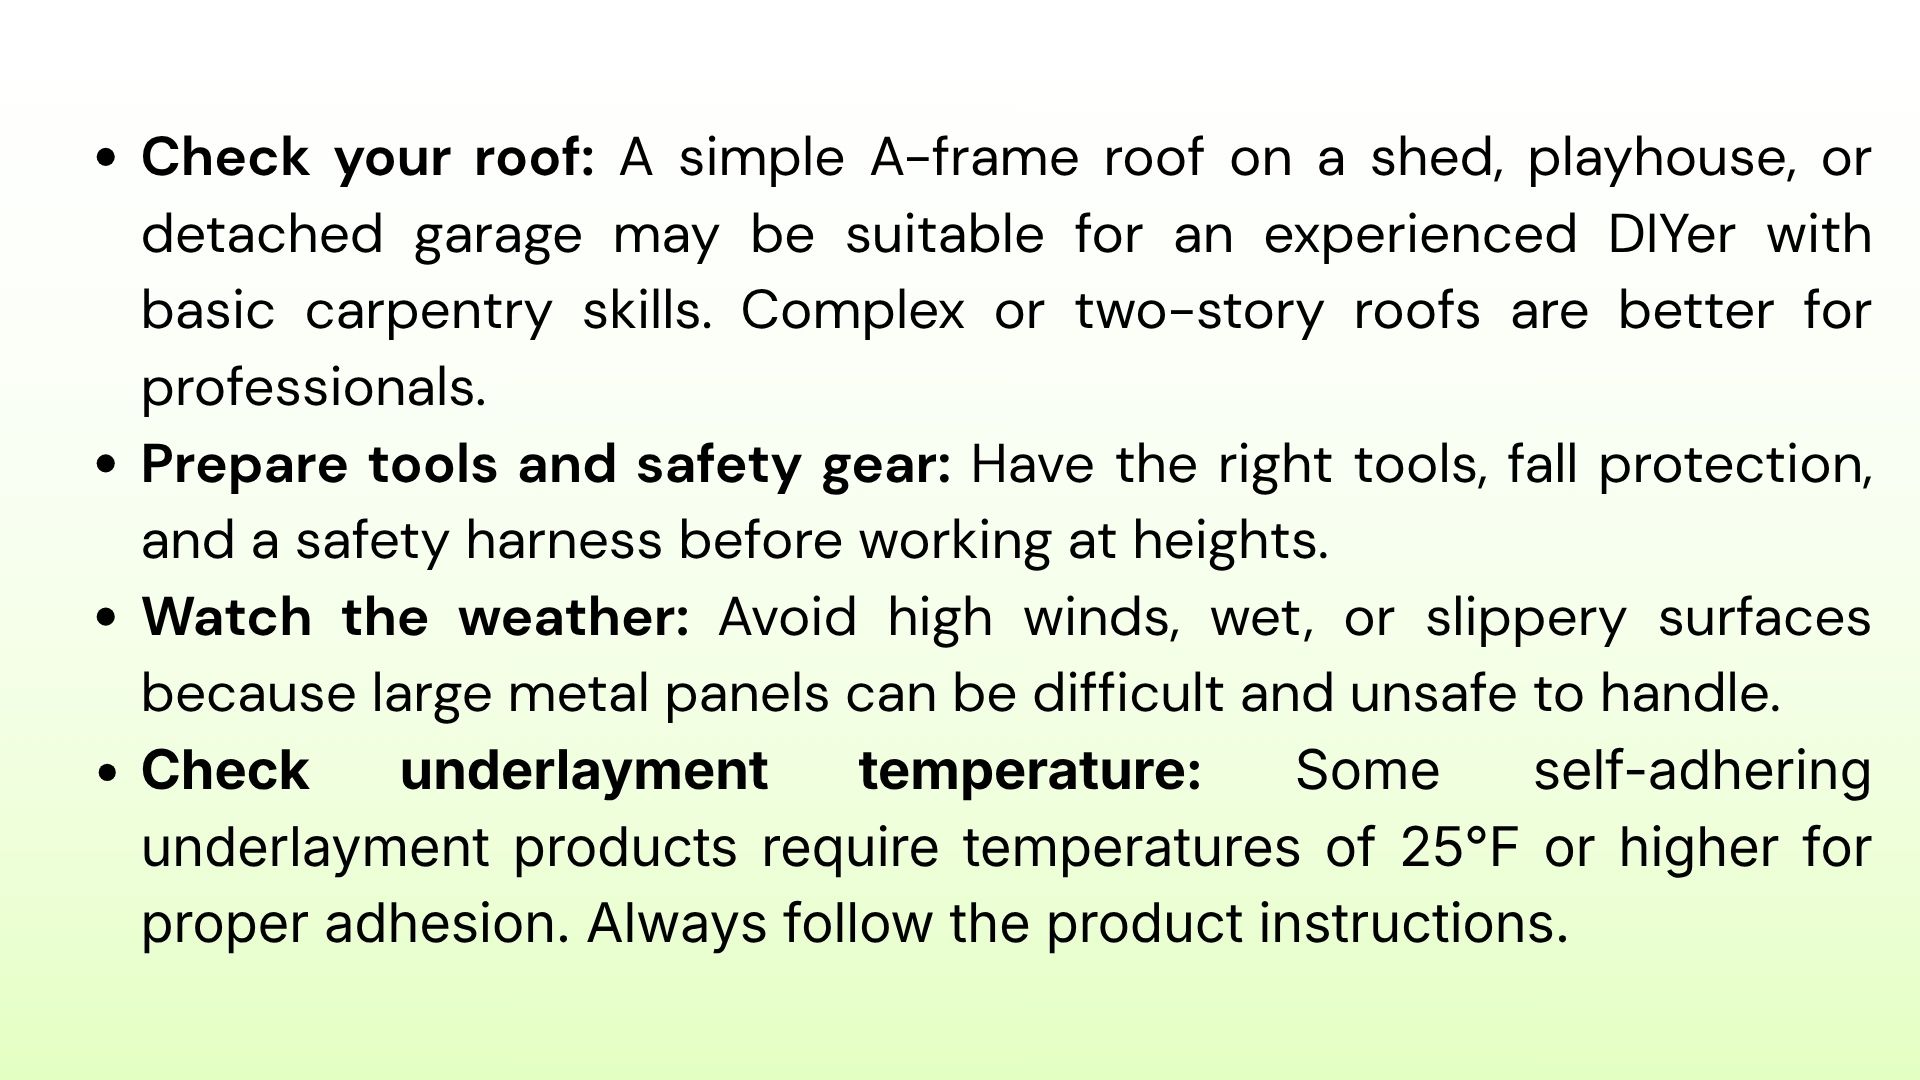
Before starting a roof installation, gather everything you need. Having the right tools and materials ready can make the work easier and help prevent delays once the panels are on the roof.
Tools Required
Aviation snips or metal shears: For cutting metal panels and trim.
Drill/driver: For installing roofing screws.
Hand seamer: For bending and shaping metal trim.
Measuring tape and chalk line: For accurate measurements and straight panel placement.
Basic carpentry tools: For general roof preparation and installation.
Fall protection and safety harness: For working safely at heights.
Work gloves and safety goggles: To protect your hands and eyes.
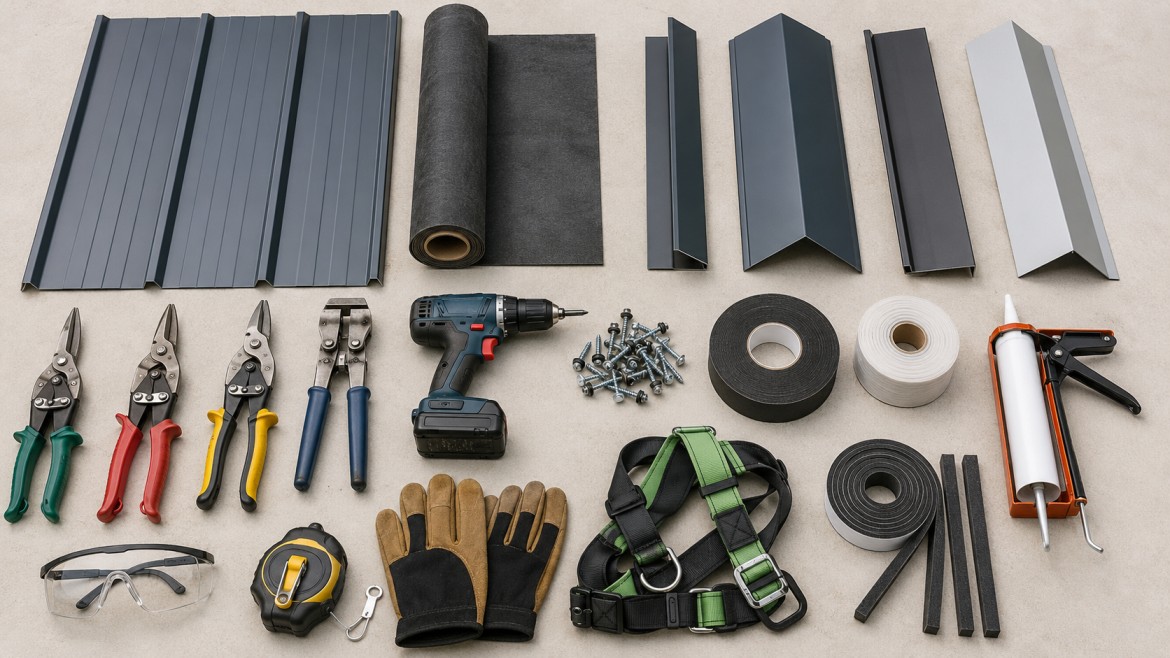
Materials Required
Metal roofing panels: Choose the panel type and gauge suited to your roof.
Synthetic underlayment or ice and water shield: Provides an additional layer of roof protection.
Roofing screws with washers: For securely fastening the panels.
Eave trim and gable trim: Protect and finish the roof edges.
Ridge cap: Covers and protects the roof peak.
Sidewall flashing: Seals areas where the roof meets a wall.
Roofing vent boots: Seal around roof penetrations.
Metal roofing sealant and butyl tape: Help seal joints, overlaps, and flashing.
Inside and outside foam closure strips: Close openings beneath corrugated panels.
Installation tip: Buy a few extra panels and fasteners. This gives you some room for cutting mistakes and makes it easier to replace a damaged panel later.
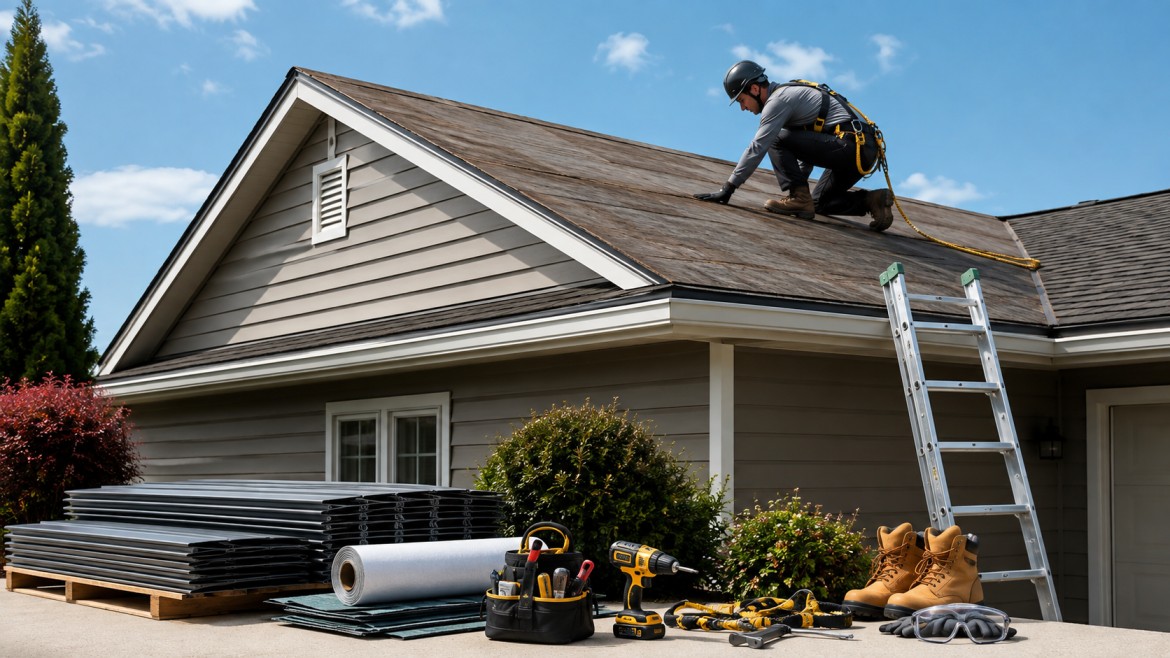
Step-by-Step Metal Roof Installation
A successful metal roof installation starts with a straight, well-prepared roof surface. Each layer has a purpose, from protecting the roof deck from moisture to keeping the metal roof panels secure and watertight. Work through the steps carefully rather than rushing from one stage to the next.
Step 1: Prepare the Roof Surface
Before installing new panels, remove any old shingles, damaged underlayment, and loose roofing materials. Inspect the roof decking for rot, soft areas, or other damage and repair these problems before continuing. The deck should be clean and smooth, with no nails or debris sticking up that could interfere with the new roofing layers.
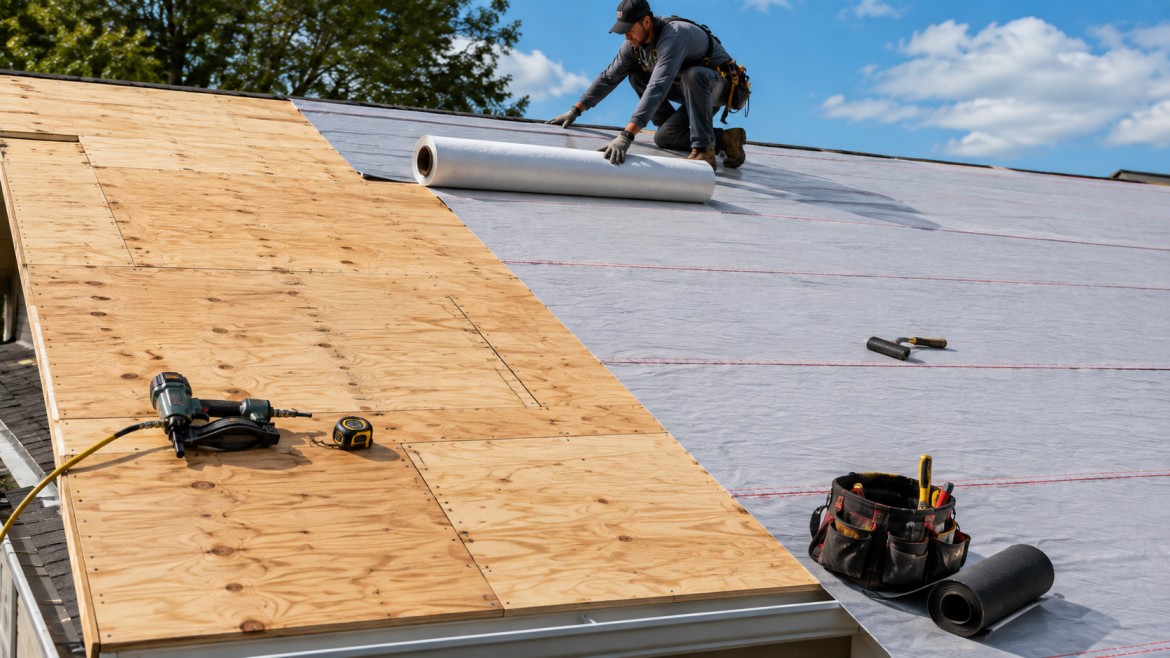
Step 2: Install the Underlayment
The underlayment creates an extra layer of moisture protection between the roof deck and metal panels. Depending on the roofing system, you may use synthetic felt, an ice-and-water shield, or another approved membrane. Follow the product instructions for temperature and installation requirements. Keep the material flat and wrinkle-free, and overlap each row as required by the manufacturer.
Step 3: Install the Drip Edge and Eave Trim
Install the drip edge or eave trim along the lower edge of the roof to help direct water away from the roof deck and fascia. At corners and joints, trim and shape the pieces carefully so they fit together properly. Use the recommended overlap, fasteners, and sealant tape for your specific trim system. A hand seamer can help create clean bends without damaging the metal.
Step 4: Create a Square Reference Line
Before placing the first panel, make sure your layout is square with the roof. A small alignment error at the beginning can become much more noticeable as you move across the roof. Use a chalk line and the 3-4-5 method to establish a straight reference line at the correct angle to the eave. This gives your first panel a reliable guide and helps keep the rest of the metal roofing installation aligned.
-a5781d6f.jpg)
Step 5: Prepare and Position the First Panel
Measure each panel carefully before cutting. Whenever possible, cut panels on the ground using tin snips, power shears, or another tool approved for the roofing material to reduce the risk of scratches and accidental damage. Before setting the first panel, install the appropriate inside closure strips along the eave and secure them with butyl tape if required by the system. Position the first panel with the manufacturer's recommended eave overhang and check it against your reference line before fastening.
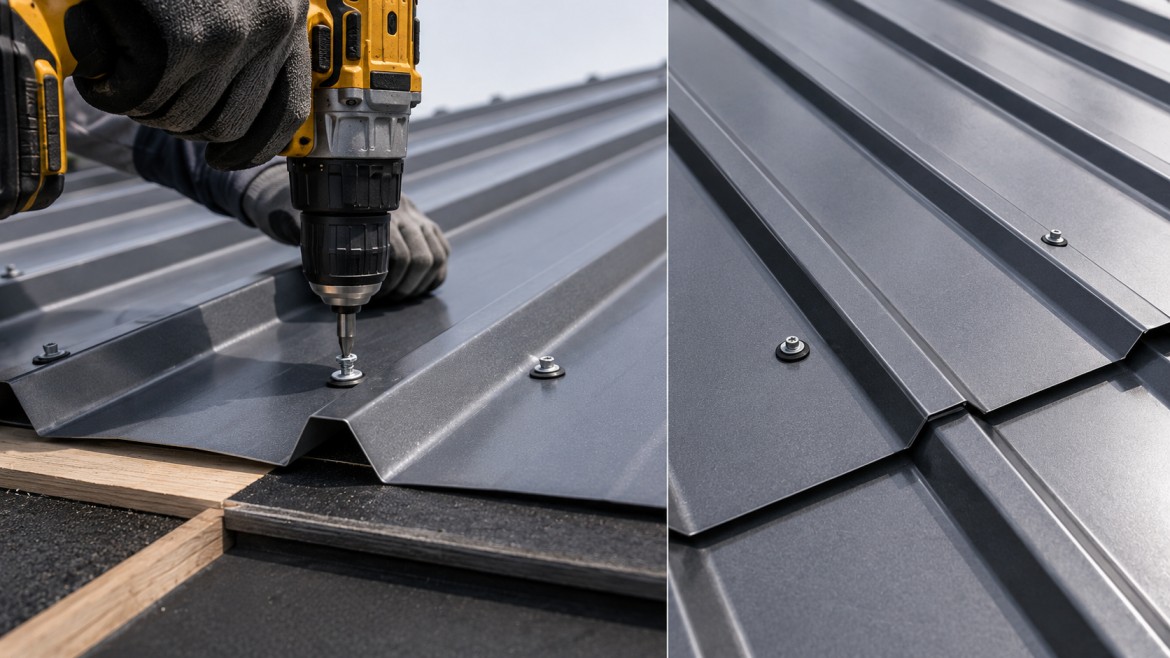
Step 6: Fasten and Overlap the Metal Panels
Use the correct roofing screws and washers specified for your panel system. Keep each screw straight and tighten it enough to create a proper seal without crushing the washer. Follow the manufacturer's instructions for the correct screw location, as fastening patterns vary between corrugated, ribbed, and standing seam systems. As you add panels, make sure each overlap fits correctly with the previous panel and that the seams remain properly aligned. Continue across the roof while checking the panel position regularly.
Step 7: Install Flashing and Rake Trim
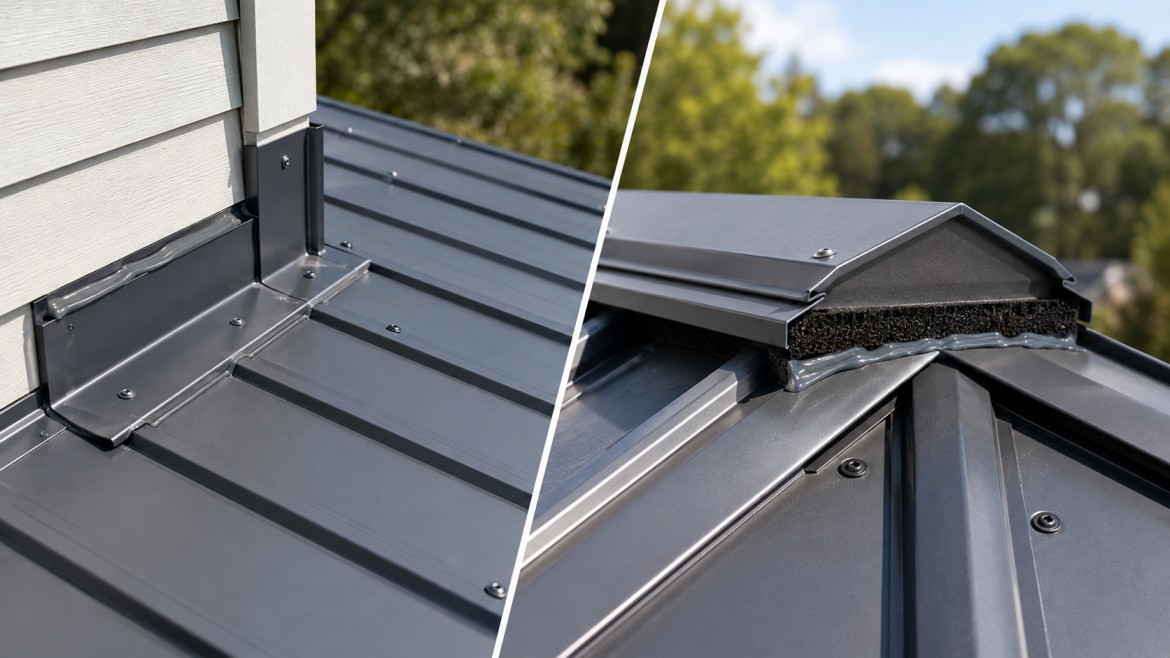
After the main panels are in place, install the required flashing around roof transitions, valleys, walls, and other vulnerable areas. Add the gable or rake trim along the roof edges to protect the panel ends and help keep rain and debris from getting underneath. Use the appropriate butyl tape or roofing sealant at joints and overlaps according to the roofing system's installation instructions.
Step 8: Secure the Ridge Cap
The ridge cap covers the highest point where the roof panels meet. Install the appropriate outside closure strips beneath the cap to help block water, wind-driven debris, and pests. Apply butyl tape or sealant where required, then position and fasten the ridge cap according to the manufacturer's instructions. Make sure the cap is straight and properly covers the panel connection.
Step 9: Complete the Final Inspection
Walk through the completed metal roof installation before considering the job finished. Check that panels are aligned, screws are properly seated, flashing and trim are secure, and all required joints are sealed. Remove metal shavings and burrs from the roof because they can eventually cause rust and damage the finish. Finally, inspect the roof from the ground and attic side, if accessible, for obvious gaps, loose components, or areas that may allow water to enter.
Installation Methods for Different Metal Roofing Panels
The right metal roof installation method depends on the type of panel you choose. Standing seam metal roofing, corrugated panels, and PBR panels use different fastening and installation approaches. If you are learning how to install metal roofing panels, understanding these differences first can make the metal roof installation process much easier.
Standing Seam Metal Roofing
Standing seam metal roofing uses concealed fasteners, so the screws and clips stay hidden beneath the panels. This gives the roof a clean appearance and allows the panels to expand and contract with temperature changes. It is different from exposed-fastener systems and generally requires more precise installation. If you are planning a metal roof installation guide or researching how to install a metal roof, always follow the specific manufacturer's steel roof installation instructions for the panel system you have chosen.
Corrugated Metal Panels
Corrugated metal roofing is a common option for residential and smaller building projects. When installing corrugated roofing panels, the panels are overlapped and secured with roofing screws according to the manufacturer's recommended corrugated metal roof screw placement. Proper corrugated metal roof overlap is important because it helps control water flow between panels. Closure strips and sealant may also be used where required. If you are planning a corrugated metal shed roof, make sure the roof is properly squared before starting the sheet installation.
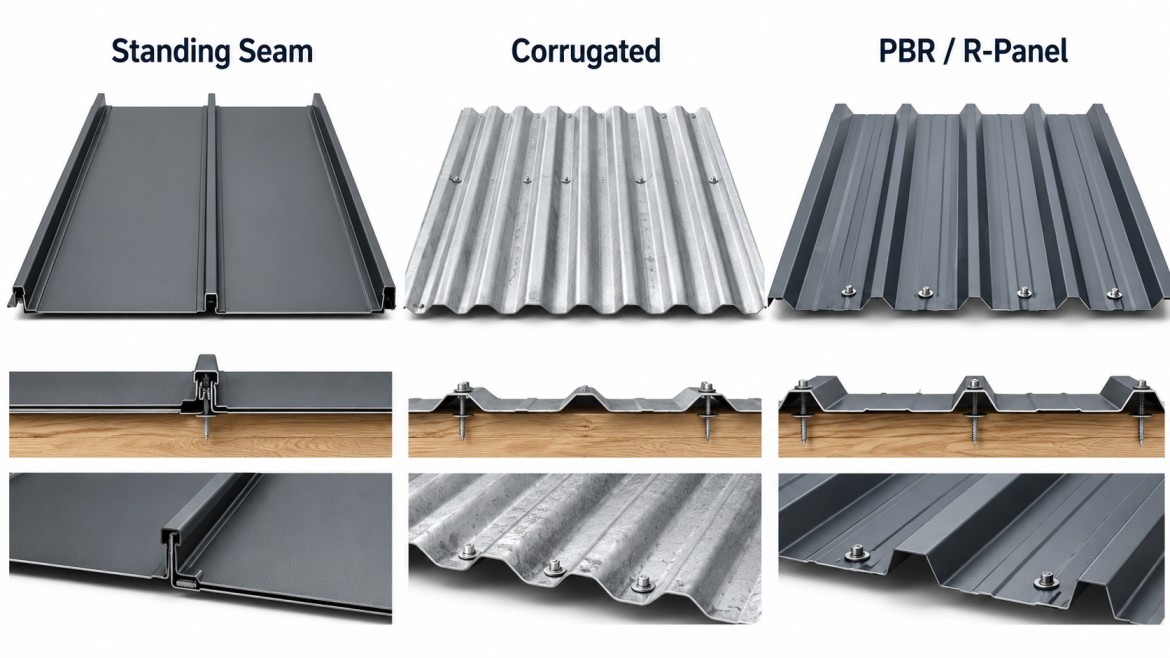
PBR (R-Panel)
PBR panels, also called R-panels, are another exposed-fastener system used in metal roofing. The installation requires accurate panel alignment, proper screw placement, and correct overlapping of the panels. If you are researching R panel installation or how to install R panel roofing, use the manufacturer's installation instructions for the required fastener spacing, panel overlap, and trim details. These details can vary between panel systems, so avoid treating every metal roof panel installation the same way.
Metal Roofing Safety Tips
For homeowners, safety should come before speed during a metal roof installation. Keep these key points in mind:
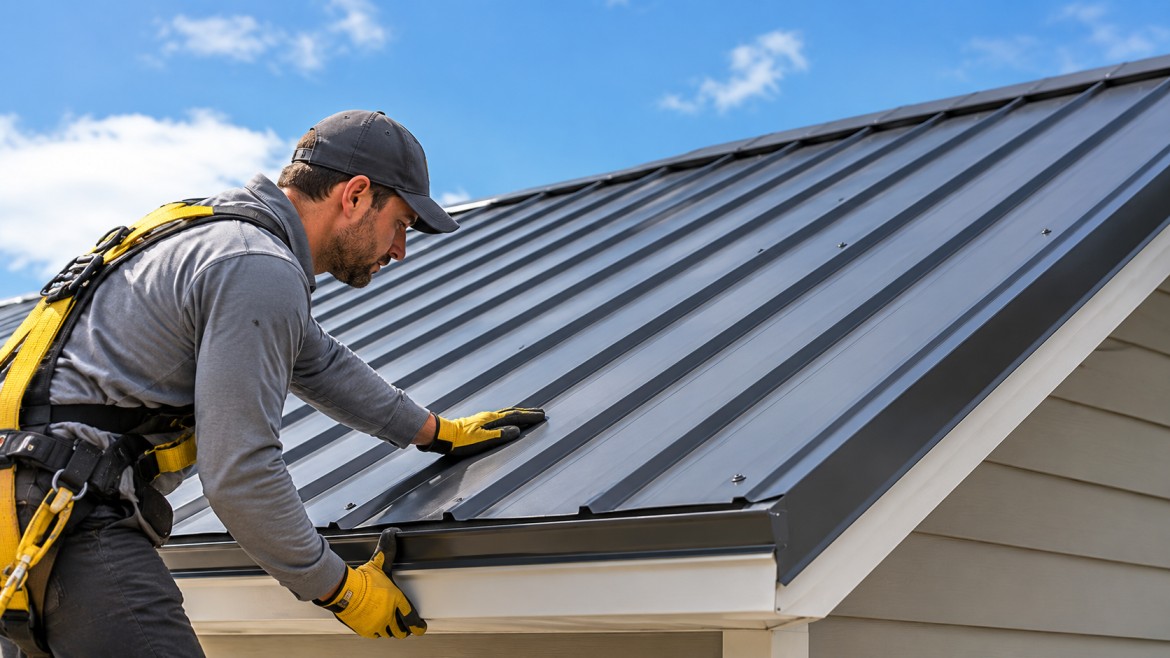
Use fall protection: Wear a safety harness when working at heights. A metal roof can be dangerous if you lose your footing.
Wear proper footwear: Use non-slip shoes or boots with good traction, especially on smooth metal panels.
Protect your hands and eyes: Always wear work gloves and safety goggles because metal panels, sharp edges, and metal shavings can cause cuts or eye injuries.
Never work on wet or frosty panels: A wet metal roof becomes extremely slippery. Wait for dry conditions before working.
Avoid high winds: Strong winds can make large metal panels difficult to control and may cause them to act like sails. If conditions are unsafe, postpone the work.
Check for hazards first: Look for overhanging power lines, trees, and other obstacles before climbing onto the roof or moving long panels.
Cut panels on the ground: Always cut panels on the ground rather than while standing on the roof. This reduces the risk of falls, injuries, and scratches to the panels.
Clean metal shavings immediately: Remove metal shavings and burrs after cutting or drilling. They can rust, damage the finish, and create slipping or cutting hazards.
Use the buddy system: Have a friend or family member nearby to help move materials and assist in case of an emergency.
For a DIY metal roof, if weather, height, roof condition, or panel handling feels unsafe, stop and consider professional help.Still have questions about metal roofing or want to learn more about whether a metal roof is right for your home? Visit SnowsBrain for more helpful roofing guides and tips.
Frequently Asked Questions
Can you install a metal roof by yourself?
Yes, you can install a metal roof yourself, but it depends on the roof size, complexity, and your experience. A simple roof on a shed, detached garage, or small outbuilding may be manageable for an experienced DIYer. A large or complex roof with steep slopes, dormers, skylights, or multiple roof sections can be harder to align and much more difficult to work on safely. If you are working at heights, make sure you have proper fall protection, a safety harness, non-slip shoes, and someone available to help with large panels. For a full-sized home or a roof that feels beyond your skill level, professional installation is usually the safer choice.
What is the correct way to install a metal roof?
A proper metal roof installation follows a clear sequence so each layer works with the next. Start by checking the roof deck and making repairs, then install the underlayment for moisture protection. Next, add the drip edge and establish a straight reference line before placing the panels. Set the first panel with the correct overhang, align and overlap the panels, then secure them with the recommended roofing screws without overtightening. Continue with the required flashing, gable or rake trim, and ridge cap, then inspect the finished roof for loose screws, open joints, damaged sealant, and metal shavings. Always follow the installation instructions for your specific panel system because fastening and overlap details can vary.
What is the labor cost for installing a metal roof?
The labor cost to install a metal roof typically ranges from $4 to $8 per square foot, or about $400 to $800 per 100-square-foot roofing square. Your final price can be higher or lower depending on several factors, including roof size, roof complexity, roof pitch, panel type, location, and the condition of the existing roof.
Do you need to put anything under a metal roof?
Yes. Underlayment is an important layer between the roof deck and metal panels. It provides moisture protection and works as a moisture barrier, helping protect the roof from water that may get beneath the panels. Common options include synthetic felt, self-healing ice-and-water membranes, an ice-and-water shield, and certain vapor barriers. Besides waterproofing, the right underlayment can help metal panels expand and contract naturally during temperature changes, which adds another layer of roof protection.